
Get in touch
Telephone:
Address:
1255 Bill Foster Memorial Highway
Cabot, AR 72023

Dehydrated Strawberries: 2 Ways
Mar 23, 2020
Dehydrated or oven-dried strawberries snacks

Any kind of dehydrated or oven-dried fruit makes for a tasty, healthy treat, but in our "un-biased" opinion, dehydrated or oven-dried strawberries are the best. Keep in mind, the more flavorful the fruit, the better your results will be. If you have strawberries left over (yeah, right) after you stop by Holland Bottom Farm, LLC, here are 2 way to save your berries for a snack, without having them go to waste.
Oven-Dried Strawberries
Not everyone owns a dehydrator, and that is ok, promise. Trust us when we say you can still get amazing tasting treats using your oven for drying strawberries. Using your oven on a low temperature, and just a little patience is all it takes to create this delicious snack. Oh, did we mention that your kitchen smells incredible afterwards?

PREP:
- These are most of the same steps with oven-dried berries.
- Wash the berries - BE GENTLE! Place the strawberries in a colander/strainer and quickly rinse them with cool water, or you may fill a large bowl with cool water and swish the strawberries around in the bowl until they're clean.
- Hull your strawberries by cutting off the green parts at the stem and remove any bad spots.
- Slice your strawberries as uniformly as possible. Smaller berries can be sliced in half (long ways) and larger berries can be quartered. About 1/8" works best. This helps make sure that the berries get done around the same time.
- Place and arrange your strawberry pieces on your baking sheets. For smaller halved berries, place cut sides up. NOTE: Make sure that none of the strawberry pieces are touching because this will cause them to stick together and not cook properly.
DEHYDRATING:
- Place your berry slices on the dehydrator trays so that there is at least a quarter-inch to a half-inch of space between the slices.
- NOTE: Some people do like to spray the trays with a little cooking spray just in case the slices stick. If you spray too much, just wipe it away.
- Place the trays in to the dehydrator.
- Set your dehydrator to 135ºF.
- Now, go to bed...Ok, you don't have to, but it will take up to 8 to 10 hours to completely dry. If you want crispier pieces, leave them in for up to 14 hours.
- Some people do rotate the trays every 4 hours or so.
COOL DOWN:
- Once you believe that all of your berries are done, turn off your dehydrator and open it.
- Allow the berries to cool at room temp for about 20 to 30 minutes.
- After that time, take one of the larger berry pieces and break it in half. You should see no visible signs of moisture when doing so.
- NOTE: You may not know if your berries are completely dried out until they have cooled completely. If any of the berries are not dry all the way, just throw them back in the oven until they are done. Just think of when you are baking cookies, and you take them out of the oven to cool. Sometimes they will crisp up as they cool. Same concept with drying out berries.
CONDITIONING & STORAGE:
- CONDITIONING: Sometimes there may still be some residual moisture in the fruit that you can't feel even if you followed all of the steps correctly. Don't worry, it should be enough moisture to prevent your berries from preserved and mold free. This is why you want to do what is called conditioning.
- You will need glass jars with lids that are air tight.
- You will then place your now cooled dried pieces into your glass jars until about two-thirds full and cover the jars.
- Now comes the fun part. You will need to shake the jars a few times a day for 1 week.
- If any condensation shows up on the sides or lid of the jars, your berries are not fully dried. If this happens, place your berry pieces back in the oven at 200ºF for about 30 to 60 minutes.
- STORAGE:
- After your pieces are done conditioning, place them in air-tight containers at room temp.
- You want to store them away from direct light and heat.
- Under good conditions, your berries can be a tasty homemade snack for up to 6 months.
Dehydrated Strawberries Using a Dehydrator
You mean to tell us that you have a dehydrator and you have never used it for strawberries? Strawberries are possibly one of the easiest fruits to dehydrate with your dehydrator. It's so easy in fact, you can do it in your sleep...You'll see why we say that later on.

PREP:
- Preheat oven to 200ºF.
- Line a baking sheet with parchment paper or silicone baking liner.
- Wash the berries - BE GENTLE! Place the strawberries in a colander/strainer and quickly rinse them with cool water, or you may fill a large bowl with cool water and swish the strawberries around in the bowl until they're clean.
- Hull your strawberries by cutting off the green parts at the stem and remove any bad spots.
- Slice your strawberries as uniformly as possible. Smaller berries can be sliced in half (long ways) and larger berries can be quartered. About 1/8" works best. This helps make sure that the berries get done around the same time.
- Place and arrange your strawberry pieces on your baking sheets. For smaller halved berries, place cut sides up. NOTE: Make sure that none of the strawberry pieces are touching because this will cause them to stick together and not cook properly.
DRYING/COOKING:
- Place baking sheets with strawberries on them in oven for about 3 hours.
- NOTE: If your oven is known to be hotter in some spots than others, you will want to turn your baking sheets around every so often so that the pieces dry evenly.
- After about 1.5 hours the berries should be dry enough to flip. Check by feeling if they are dry to the touch. If not, wait about another 30 minutes and flip the berry pieces.
- For the last hour, you will want to keep an eye on the oven (and of course the berries). The smaller berries will start getting done first. You can take those out of the oven to cool until the larger pieces get done.
COOL DOWN:
- Once you believe that all of your berries are done, carefully remove the baking sheets from the oven.
- Allow the berries to cool at room temp for about 20 minutes.
- After that time, take one of the larger berry pieces and break it in half. You should see no visible signs of moisture when doing so.
- NOTE: You may not know if your berries are completely dried out until they have cooled completely. If any of the berries are not dry all the way, just throw them back in the oven until they are done. Just think of when you are baking cookies, and you take them out of the oven to cool. Sometimes they will crisp up as they cool. Same concept with drying out berries.
CONDITIONING & STORAGE:
- CONDITIONING: Sometimes there may still be some residual moisture in the fruit that you can't feel even if you followed all of the steps correctly. Don't worry, it should be enough moisture to prevent your berries from preserved and mold free. This is why you want to do what is called conditioning.
- You will need glass jars with lids that are air tight.
- You will then place your now cooled dried pieces into your glass jars until about two-thirds full and cover the jars.
- Now comes the fun part. You will need to shake the jars a few times a day for 1 week.
- If any condensation shows up on the sides or lid of the jars, your berries are not fully dried. If this happens, place your berry pieces back in the oven at 200ºF for about 30 to 60 minutes.
- STORAGE:
- After your pieces are done conditioning, place them in air-tight containers at room temp.
- You want to store them away from direct light and heat.
- Under good conditions, your berries can be a tasty homemade snack for up to 6 months.
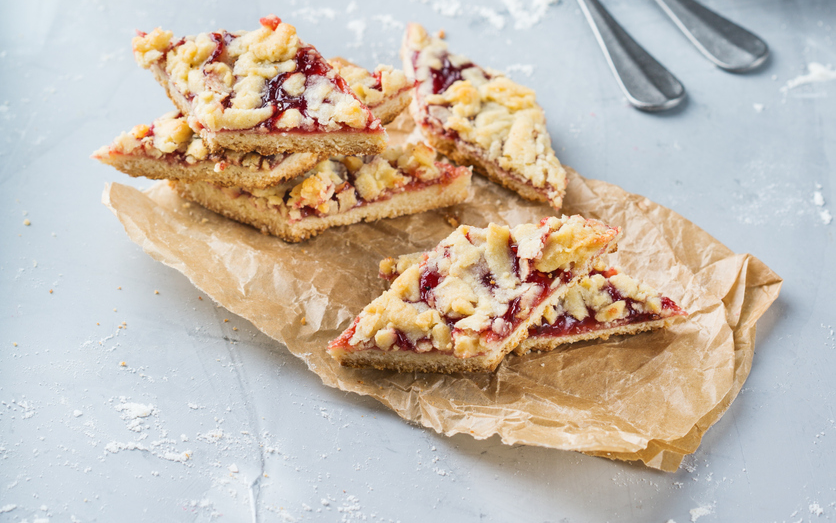
We are gearing up for strawberry season here at Holland Bottom Farm, LLC and we thought we would share this heathy recipe to get you ready, too! These healthy strawberry oatmeal bars are filled with fresh strawberries and topped a buttery crumble topping and glaze. They are perfect for breakfast or a mid-day snack without being overly sweet These bars are less than 150 calories per serving, so no need for added guilt when indulging! We are including ways to make this recipe gluten free, dairy free AND vegan as well!

Are you looking for a quick and easy dish to make for your next holiday party, office potluck, or anytime you don't have the time to spend hours in the kitchen? Don't worry we have you covered with this quick and easy corn dip recipe.
We accept all major credit*, debit*, & SNAP
We do not accept checks
*4% processing fee on all credit & debit cards
*No U-Pick 'Em
CONTACT US
Telephone: 501-259-9986
Address: 1255 Bill Foster Memorial Hwy | Cabot, AR 72023
If you've visited our Farm, let us know what you think!
Powered By Flypaper
| Privacy Policy